


Understanding Embroidery Stabilizers: The Key to Perfect Stitches
In this guide, we’ll break down everything you need to know about stabilizers—types, uses, how to choose the right one, and pro tips to help you get perfect results every time.
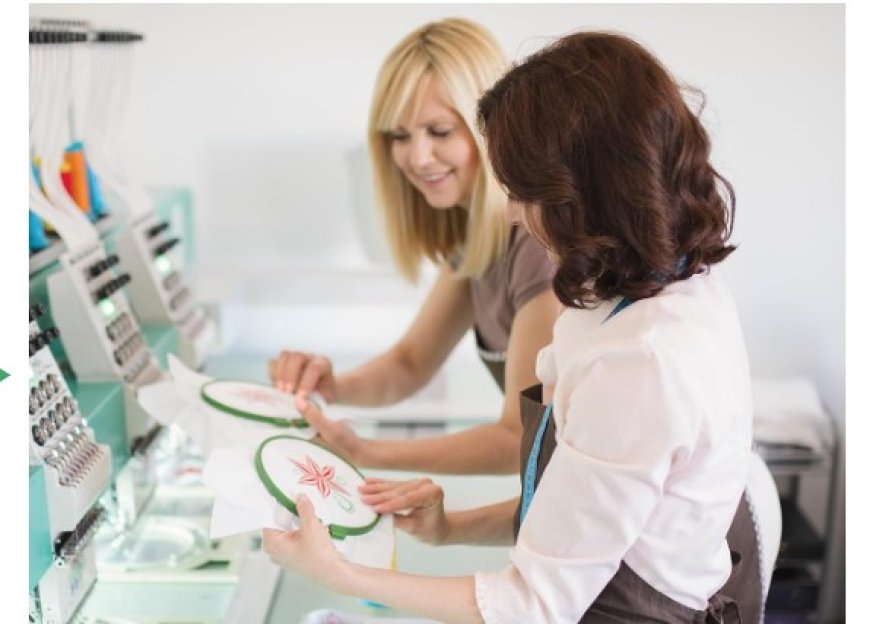
Ever wondered why some embroidery projects come out flawless while others pucker, stretch, or fall apart after a single wash? The secret ingredient might not be your machine or threadits the types of embroidery stabilizer you choose.
Embroidery stabilizers are the unsung heroes of beautiful, professional-looking stitches. Whether youre working with stretchy t-shirts, thick towels, or delicate linens, using the right stabilizer ensures your design stays crisp, clean, and exactly where it should be.
In this guide, well break down everything you need to know about stabilizerstypes, uses, how to choose the right one, and pro tips to help you get perfect results every time.
What Are Embroidery Stabilizers?
Embroidery stabilizers are materials placed under, over, or within fabric to support it during the stitching process. They prevent shifting, puckering, and distortionespecially when working with soft or stretchy fabrics.
Think of them as a foundation. Just like a painter needs a good canvas, embroidery requires a stable base to build on.
Types of Embroidery Stabilizers
There are three main categories of stabilizers, and each serves a different purpose depending on your fabric and design.
1. Cut-Away Stabilizers
Best For: Stretchy, unstable fabrics (e.g. knits, t-shirts, polos)
Cut-away stabilizers stay permanently attached to the fabric. After stitching, you trim the excess around the design, but the part underneath remains.
Pros:
-
Excellent long-term support
-
Ideal for wearables that go through regular washing
-
Prevents distortion over time
Popular options:
-
Medium cut-away
-
Soft mesh cut-away (great for baby clothes and lightweight fabrics)
Use when: You're embroidering on garments with stretch or movement.
2Tear-Away Stabilizers
Best For: Woven fabrics like denim, canvas, or twill
Tear-away stabilizers are removed by gently tearing the excess away after stitching. Theyre fast and easy to use but offer less long-term support.
Pros:
-
Quick cleanup
-
Doesnt add bulk
-
Great for stable, non-stretchy fabrics
Use when: Youre embroidering patches, caps, or firm garments that dont require much stretch.
3. Wash-Away Stabilizers
Best For: Sheer or delicate fabrics (e.g. organza, lace) and freestanding lace designs
As the name suggests, these stabilizers dissolve in water, leaving no trace behind. Theyre ideal when you dont want any backing to show.
Pros:
-
No leftover backing
-
Ideal for lace or transparent fabrics
-
Can also be used as a topping (more on that soon)
Use when: You need invisible support or are creating standalone embroidery elements.
Bonus: Water-Soluble Topping (aka Solvy)
While not a stabilizer in the traditional sense, toppings are often used on top of high-pile fabrics like towels or fleece. They prevent stitches from sinking into the fabric.
Use with: Terry cloth, minky, velvet, or textured knits.
Always remove using warm water or gentle steam.
How to Choose the Right Stabilizer
Choosing the right stabilizer depends on three main factors:
1. Fabric Type
Ask yourself: Is the fabric stretchy, thin, or thick?
|
Fabric Type |
Best Stabilizer |
|
Stretch knits |
Cut-away |
|
Denim/canvas |
Tear-away |
|
Sheer/lace |
Wash-away |
|
Towels/fleece |
Tear-away + topping |
2. Design Density
Heavy stitch designs (high stitch count) need more support.
-
Dense designs: Use heavy cut-away or multiple layers
-
Light designs: Light tear-away or wash-away is enough
3. Project Type
Are you embroidering something wearable, decorative, or delicate?
-
Wearables: Cut-away for lasting durability
-
Dcor or accessories: Tear-away for cleaner finish
-
Lace or sheer fabric: Wash-away
Pro Tips for Using Embroidery Stabilizers
Hoop Both Fabric and Stabilizer Together
For the best tension and stitch quality, hoop the stabilizer and fabric as oneespecially with cut-away or tear-away options.
Use Adhesive Stabilizer for Hard-to-Hoop Items
If youre working on small items (like baby bibs or socks), use sticky stabilizer to float the fabric without hooping it.
Dont Over-Stabilize
Too many layers can make your design feel stiff and bulky. Use only what's needed for stability.
Trim Carefully
With cut-away stabilizers, trim close to the stitches without cutting into them. Soft mesh types are especially great for comfort on the skin.
Always Test First
If youre unsure, do a test stitch on a scrap of the same material. This lets you preview how the fabric, stabilizer, and design interact.
? Best Practices by Project Type
Heres a quick guide to match stabilizers with common embroidery projects:
|
Project |
Stabilizer Combo |
|
T-shirts & polos |
Soft cut-away (mesh) |
|
Towels |
Tear-away + water-soluble topping |
|
Baby clothes |
Soft cut-away + optional topping |
|
Caps & hats |
Firm tear-away or cap backing |
|
Freestanding lace |
Wash-away stabilizer |
|
Sheer fabrics |
Wash-away (under + topping if needed) |
Where to Buy Quality Embroidery Stabilizers
Look for stabilizers from trusted brands like:
-
Sulky
-
OESD
-
Floriani
-
Pellon
-
StabilStick by DIME
Or get expert help with full embroidery digitizing services that include stabilizer recommendations from Digitizing Buddy your trusted source for custom embroidery digitizing done right.
Final Thoughts
Embroidery stabilizers are more than just backingtheyre the backbone of professional embroidery. Choosing the right stabilizer ensures your stitches stay sharp, your fabric lays flat, and your design lasts for years.
So the next time your embroidery project puckers, frays, or stretchesdont blame your machine. Revisit your stabilizer.
Need a perfect embroidery file to match your stabilizer setup?
Trust Digitizing Buddy for stitch-ready embroidery digitizing services tailored to your fabric, design, and project type.